Hi!
Everybody that knows me also knows how thrifty I love to be, but I must confess even I am proud of myself for this one!
The story: My daughter is going to be a viking for halloween (will post to here!) and wanted me to be a dragon...uh??!?!?? hum..nope, I don't think so, but then I thought I could use a little something to take her trick or treating on monday...but what?
I always loved fascinators but never had the guts to use one or worse, was never invited to a royal wedding haha....Soooo, I thought that halloween, trick or treat etc, could be a good excuse to wear one...To make a long story short, I decided to make one with stuff I had home...and I succeeded I think!!!!
If you girls have at home some fabric scraps, needle and thread, a hot glue gun ( or fabric glue) and..........
a coaster ( mine I had bought at the dollar store and very well used) and a produce bag ( mine was apple's), you are in!!!
Ah, grab those dollar store feathers from the kids craft bin and you have a plus!
Ah, grab those dollar store feathers from the kids craft bin and you have a plus!

Before you think "she could have used russian or french net, much fancier..."
Hey, I do have french/russian net that are extremely pricey and I use for my store, didn't want to "waste" with me..:0)
And, let me tell you, this apple produce bag almost looks like the real thing!

I used 3 fabric rosettes, 2 rolled ones and one with the singed edges. For the latter, I used the method below, with candle and circle shape pieces.
I used needle and thread to sew them together and to attach some pearls
For the rolled rosettes I used 2 strips of black satin, 24 inches and 20 inches long and 1 inch wide. I love frayed edges, so I just used this way.
Tie a knot at one end and start rolling, and as you roll, keep the fabric folded in half and glue or sew as you go .
For satin, I prefer the needle and thread method, it is easier and secures better.
I can see a rosette already!
At the end, just cut the extra fabric (the end close to the initial knot) or sew it to the flower
Make 2 flowers...or more if you wish!
Now I have 3 flowers....humm..black..will go perfect with purple feathers, orange coaster and black produce bag! "VEEERY HALLOWEENY"
Now to the fun part, assemble the fascinator! My bogus friends...my coaster for the mini hat/fascinator and my apple produce bag playing the oh-so-fancy russian net role....très chic ladies!
Aren't these colours amazing for Halloween?
Now, cut the coaster like this, half a diameter
Get the two edges together, on top of each other ( am I explaining this well? I hope so!) and glue. Your little hat is ready.
Start attaching the rosettes the way it pleases you.
It looks gorgeous already, doesn't it? Do not forget the feathers! Glue now!
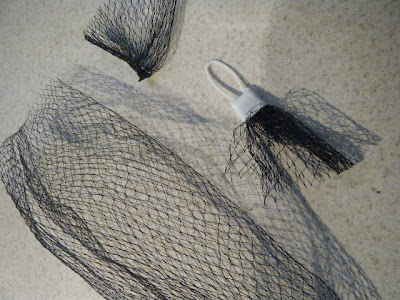
Enter the "star"...the produce bag...get rid of the ends...
Open it
Grab one end
( sorry, before that you should cut a felt /fabric circle to the back)
Attach the end you have in your hand to the bottom of your mini hat ( hot glue), and finish it with the felt circle
If you do not have, buy a comb at the dollar store and glue it to the fascinator
well, well, well, royal wedding anyone? or garden party? haha
Well, in my case, trick or treating with Sofia!
I am not a good model, taking picture of myself even worse, so bear with me girls!
Monday here I go!


What a great job :)
ReplyDeleteand do not miss.....
S
A
T
U
R
D
A
Y
S
H
O
W
O
F
F
It´s fun to join it :)
WELCOME :)
Håkan ( The Roseman)
Beautiful job! I bet you're excited to wear it Monday!!
ReplyDeleteI want one of these for every Sunday! I'm your newest follower! Come find out about the scariest thing!
ReplyDeleteThank you !!!!!!
ReplyDelete