Saturday, July 30, 2011

Fun with beading wire

Hi!!
This week, when at my local craft store, I saw some pink 24 gauge beading wire for sale for 
$ 2.49..humm, inviting......  so, despite never have worked with wire before, I decided to give it a try and have some fun at the same time. I had seen these cute wire nests all over the internet, and I immediately wanted to try making them.
After looking at some of the many tutorials out there, I decided it was time to try. Actually, there is no wrong or right way to do this, I noticed that soon one develops his/her own technique....so do not worry :0)
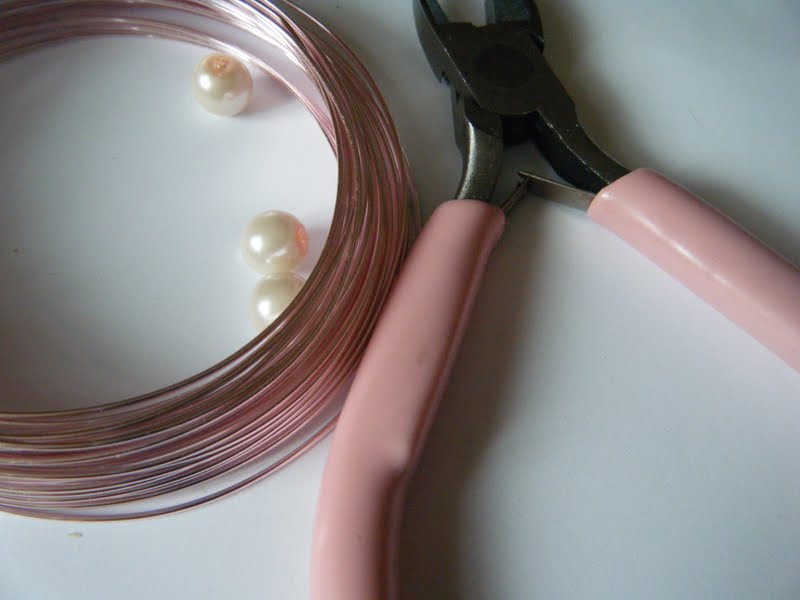
 I gathered:

1.  Glass pearl beads
2. Beading wire - I used approximately 24 inches for the nest
3. Cutting plier

 Start beading at one end and after you have all 3 beads in, bend this end of the wire in order to keep the beads from sliding off
At this point, bend the wire in a circle motion, to have the pearls in this shape below
 After that, just keep encircling the pearls with the wire, always trying to keep a circle shape, as sometimes a triangle shape wants to form instead...at least with me :0)


 When you think your nest is full enough, and while you still have wire left, start passing the wire through the loops, in order to keep them together .


 I made there of these "security" points
 Cut the wire at the end, leaving a bit for you to twist and make the hanging part

 In the end,  I actually did not like this hanging part and twisted it to the back of the nest,  I'll show it at the end
I also tried another design using only one bigger pearl
The process is much the same


But "behold", there is more!!! more fun!! and in the cheaper side...:0). My sweet nieces had collected these beautiful sea glasses at the shore and I simply stole ( bad bad aunt Dea) 2 of them, with their authorization, of course:0) ...BUT sniff sniff,  could not steal the aqua ( the one I had my eye on!!) one..the sweeties said NO NO NO! hahahah no problem....still love them-my nieces- to pieces:0)

 Using a smaller piece of wire, I started encircling the glass...not much to explain here, or maybe I dunno how...:0(
I hope the photos are  somehow self- explanatory...


Now with the chains, ready to be used


Next time I will look for the silver wire, as I think it is more neutral.
What do you think?


Lovely Crafty Home


Making


Thursday, July 28, 2011

"Landee see" my jars!

Hi !!!


Just a quick and happy note to say that today, Landee, from Landee see Landee do featured some beautiful projects over her blog and she included my Painted Glass Jars! Can you believe it?

I am thrilled!!

Please check it out her beautiful blog and all those creative and gorgeous projects!! Can I say mine included? :0)


Thanks Landee!

Blessings


Monday, July 25, 2011

Painted Glass Jars


Hi!

Since I saw one of these ( YES, Pinterest rules!!), I fell in love with the many, many possibilities, with the many, many ways to do it and how simple it seemed!


Isn't that beautiful ? Take a thrifty store old glass jar ( don't get me wrong, I love them " al naturele " as well, but sometimes I need some colour around me, and I am in one of these moments now, I need colour!!) and transform it with any colour  you desire, in the comfort of your home!!
There are so many ways to do it, one can pick whatever !
 I decided to paint these old ones I had at home to how would it feel  with some more colour around here


I used: 
1. White craft acrylic paint
2. Food colouring- blue
3. A long paint brush
The most challenging part was to figure out what exact shade of blue I wanted. As I was aiming for a more milky glass look, the combination that, in the end, gave me that look, was one tablespoon of white paint and a tiny drop of food colouring. Gals, Watch out for spills, as this thing (food colouring) is nasty, almost stained my kitchen countertop!
Next, I mixed both with the brush. For my first glass I did not use a TBSP as I mentioned earlier, so the end result was a glass with a little more blue hue than I wanted,  but still beautiful. So, at this stage, add more white ( or blue) depending of what you want as a final look.

Then, I started to paint the interior with the brush. If you do this delicately and patiently,  the brush marks will me minimal. It may be tricky in the more curved vases, but the next stage will help cover the whole thing, do not worry. Next,  I added approximately 2 TBSP of water, shook the glass and then, with a circle movement , tried to cover the whole  interior of the glass with paint. 

Finally, I turned the glasses upside down on a cookie sheet protected with tin foil ( you can use anything, I just used what was handy at the moment) to drain and finalize the covering.
I left the glass like that for 20 minutes and then turned them up again and left to dry for 1 hour.
READY and GORGEOUS!


READY and GORGEOUS!


Just to show you girls how I take my pictures in my, ahem , fancy and posh outdoor photo studio :0)


I LOOOOVE this combination of light pink and milky blue

My new colourful and romantic entrance hallway. "Sad" news, because I used craft acrylic paint I can''t pour water inside and use them as a flower vase, but who cares?????


Blessings, 


Todays Creative Blog


Tip Junkie handmade projects

The Girl Creative


Running with Glitter